Difference between revisions of "Account/AccountCreation"
Scarpenter (talk | contribs) (→Wizard Screen 1: Create Account) |
Scarpenter (talk | contribs) (→Wizard Screen 1: Create Account) |
||
| Line 65: | Line 65: | ||
|CRM Export Ref || An optional field for an identifier from a legacy CRM. | |CRM Export Ref || An optional field for an identifier from a legacy CRM. | ||
|- | |- | ||
| − | |Xero Account Name || Associate the customer with a Xero Account. Requires | + | |Xero Account Name || Associate the customer with a Xero Account. Requires the [https://resources.emersion.com/display/EKB/Xero | Xero integration] to be enabled. |
|- | |- | ||
| Auto Generate Cost Centre || Requires subscription to the [https://resources.emersion.com/display/EKB/Cost+Centres | Cost Centre] module. [https://resources.emersion.com/display/EKB/Auto+Generate+Cost+Centres+for+an+Account | Click here for the instructions on this setting]. | | Auto Generate Cost Centre || Requires subscription to the [https://resources.emersion.com/display/EKB/Cost+Centres | Cost Centre] module. [https://resources.emersion.com/display/EKB/Auto+Generate+Cost+Centres+for+an+Account | Click here for the instructions on this setting]. | ||
Revision as of 12:03, 22 April 2020
Create Customer Wizard - End User Accounts
Creating end user customers in Emersion is able to be achieved in a number of ways, including via the
- Sign Up Portal
- API
- Cumulus
This article is limited to the Create Customer wizard in Cumulus and focuses on creating End User customers. While the process is similar for other types of accounts, the fields and steps may vary. If you want to know how to create retail service providers, non-retail billing service provider, Agents or other types of accounts, start at the Account Management page and choose from the relevant list of account types.
To create a new customer:
Nav: Customer > Create Customer to start the wizard.
The wizard will follow a series of steps to assist you with creating an account, entering both required and optional information. The information collected via the wizard will vary based on the type of account you are creating; Organisation or Individual.
The progress bar will tell users how many steps they have completed, and are yet to complete.

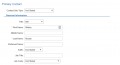
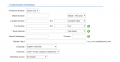
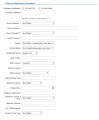
Wizard Screen 1: Create Account
This first screen has the initial settings that determine the account's behavior in terms of billing. Therefore for billing to be accurate, it is important these settings are correct before proceeding.

Wizard Screen 1: Data Definition
| Data field | Description |
|---|---|
| Account Enterprise | An account can be an individual or organisation. Data collection on the following screens changes depending on your selection here. |
| Account Type | Select between Agent and End User if Agent module is enabled. Otherwise leave as End User. Note: If a person or company is both an Agent and a customer of yours, they will need two accounts, one for each type. |
| Start Date | This date is very important. Usage cannot be processed for services before this date. Services and accounts CAN be backdated for back-billing purposes. If you do not know the actual start date of the customer, or the start date is greater than 6 months in the past, provide the earliest date from when usage will be collected. This date will be the very first opening date of the account's first account invoice period. Usage received by Emersion before this date cannot be processed onto an invoice. |
| Account Profile | If you have multiple account profiles for the customer. |
| Account Invoice Method | Defined how the invoice will be sent to the customer. |
| Account Invoice Template | All accounts must be allocated an invoice template from which their invoice will be created. If you have multiple invoice template layouts, choose the one for this customer or leave it as the default. The default template can be set globally by the service provider, overridden by the account profile invoice setting or overridden for a given customer. |
| Account Billing Day | The actual day, within the month, that the customer Account Invoice Period will begin. This can be a default set globally by the service provider, overridden by the account profile or overridden for a given customer. As is standard in the Emersion platform, invoices are generated 2 days after the close of the invoice period. For example: If you set this value to 7, the customer's invoice will be generated on the 10th of every month (being 2 days after the close of the account invoice period) and providing you have opted for the standard 1 month period length as defined by the Period Length Months field below). |
| Invoice Itemisation | Defines if the invoice will include itemised usage records, or a summary only. |
| Automatically Allocate Payments To Invoices: | Define if payments received fgrom the customer are allocated to invoices automatically. By default, payments will be allocated to the oldest invoice that has an outstanding amount owing first. |
| Credit Limit | This is a credit limit for the account. It is used by the system in a number of ways, for example:
|
| Unbilled Credit Limit | This is the unbilled credit limit for the account. This can be set globally by the service provider, overridden by the account profile or overridden for a given customer. If this is set, the Credit Limit Exceeded event notification can be leveraged to send the customer an alert. |
| Trading Due Days | This setting controls how many days after an invoice has been generated it will fall due. E.g. If the customer's invoice is due 7 days after it is generated, enter "7". If the customer's invoice is due 14 days after the issue date, enter "14". This can be set globally by the service provider, overridden by the account profile or overridden for a given customer. |
| Period Length Months | The amount of time that passes between invoice periods. E.g. If you set the Account Billing Day to 1 & the Period Length Months to 1, the customer will receive an invoice on the 3rd of every month (invoices are generated 2 days after the close of the invoice period) |
| Align Pkgs to Acct | This flag will align any newly created package subscriptions to the underlying account invoice period for the given customer. This will ensure all access fees and usage fees are aligned to when an invoice is rendered. It is important to note that some package configurations can conflict with this setting, producing undesirable billing results. For instance, a package bundle comprising month-to-month billing for an ADSL service and web hosting. These services will align to the underlying account invoice period nicely, as they are billed monthly. However if the package plan also contains a Domain Registration service (for 1 year, 2 years, or 3 years), it is not desirable for this to be aligned to the customer's account invoice period. |
| Export Reference | An optional field that, if used, can be used in a customer search to locate the account. E.g. Former account number from a previous system. |
| CRM Export Ref | An optional field for an identifier from a legacy CRM. |
| Xero Account Name | Xero integration] to be enabled. |
| Auto Generate Cost Centre | Cost Centre] module. | Click here for the instructions on this setting. |
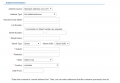
Wizard Screen 2: Primary Contact
When the user arrives at step 2 of the wizard, a new account record is saved in the system in a status of Preactive and is given a unique ID. This ID is the customer's account number. This activity can be seen by users in a blue notification below the main Cumulus menu.
New accounts transition from Preactive to Active once all steps of the Create Customer Wizard has been completed. Should a user need to leave the wizard, or the user is thrown from the wizard for any reason at all, the account data up to the last save point is retained by the system. This means that users can exit the wizard and return at a later time without having to start the wizard from the beginning. If users know the account, they can pick up their place in the wizard where they left off.
Step two of the Create Customer Wizard captures the information of the primary contact for the account. The fields on the screen can change based on your choices. The most obvious place where this happens is in the address section. A complex address will capture more information than a simple or standard address, enabling Emersion to support address data from any other sources systems, such as legacy systems or Customer Relationship Management (CRM) systems.
'Emersion Tip:' Emersion recommends breaking down the account and contact addresses into each individual field element where it is possible to do so. This data breakdown process is called 'data normalisation'. Normalising data makes reporting and searching far easier. It is very time consuming and difficult to search for customers in the suburb of "Cheltenham" if your data is entered into line number fields as "1/123 Main St" and "Cheltenham VIC 3123". Use Standard and Complex addresses where ever possible and break down the data into field elements to make this searching feasible.
Personal details
Communication information
Address information for a Standard address
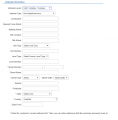
Address information for a Complex address
Privacy & verification information
End User Portal login information


Wizard Screen 2: Contact Form Data Definition
| Data field | Description |
|---|---|
| Personal Information | |
| Contact Sub-Type | Select from the list of options if you wish to flag this contact with any of the sub-types. |
| Title | Select from the list of options the correct title of the primary contact. This is also known as a 'Salutation'. |
| First name | The first name of the contact. |
| Middle Name | The middle name of the contact, if known. |
| Last name | The surname of the contact. |
| Preferred name | If the contact prefers to be known by an alternative name, enter that here. |
| Suffix | Give the contact an optional suffix if known. |
| Job title | Enter the job title if know. If you specify a job title, the Job Code is then mandatory. Otherwise, Job Code is optional. |
| Address Information - 'Note: Only Complex Address fields are documented here' | |
| Address Layout | Your selection here will determine what fields are shown to enter address information. Emersion recommends users enter addresses using the Standard or Complex layout. |
| Address type | Select from the list of address types, if known. |
| Lot number | Enter a lot number if it is part of the address. |
| Nearest Cross Street | A text field used to capture the nearest cross street, if desired. |
| Building name | A text field used to capture the name of the building if it is relevant. |
| Site location | A text field used to capture the site location if it is relevant. |
| Site name | A text field used to capture the site name if it is relevant. |
| Unit type | Select from a list of unit types if it is relevant. If you choose a unit type, the unit number becomes mandatory. |
| Unit number | Enter the number of the unit. If you enter a value here, you must choose a unit type. |
| Level type | Select from a list of level types if it is relevant. If you choose a level type, the level number becomes mandatory. |
| Level number | Enter the number of the level. If you enter a value here, you must choose a level type. |
| Street number | Enter the street number. If the address spans multiple numbers (e.g. 6-8) use both fields to separate the start and end street numbers. |
| Street name | Enter the street name. Do not enter the type after the name of the street. E.g. "Smith Street" should be entered as "Smith" and "Michigan Avenue" would be be entered as "Michigan" |
| Street type | Choose the street type that matches the street name. |
| Street suffix | If it is applicable, choose the street suffix. |
| Suburb | Enter the street name. Do not enter the type after the name of the street. E.g. "Smith Street" should be entered as "Smith" and "Michigan Avenue" would be be entered as "Michigan" |
| Postcode | Enter the postcode. There is no postcode validation or postcode/suburb matching in Emersion, so be sure to enter the postcode correctly. |
| State | Choose the state. |
| Country | Choose from the list of countries. |
| Date from | A field to store the date from when the contact commenced living/operating from at this address, if desired. |
| Communication Information | |
| Preferred number | Select from the list of options. The user's choice determines which of the following phone number fields are mandatory. For example, choosing Mobile will mean at least one mobile number must be provided. Choosing landline means at least one landline number must be provided. Users can enter as many phone numbers as required by clicking the 'green plus' icon exposing further number fields. |
| Ext | If you know the extension to the phone number, you can enter it. |
| Enter the contact's email address. Additional email addresses can be entered by clicking the 'green plus' icon exposing alt email address fields. | |
| Internet Messaging | Enter the IM of the contact, if desired. |
| Provider | Provider of the IM service in the IM field. |
| Website | Enter the website of the contact if desired without the 'http://' |
| Language | Select the user's primary language. |
| Timezone | Choose from the list of timezones where the user is based from. |
| Marketing source | Select from the list of options how the customer was sourced. |
| Privacy and Verification Information | |
| Marketing Notification | Flag the customer as not interested in receiving cross-promo marketing notifications by phone or via email. Using this flag does not affect the distribution of any notifications from Emersion's system. The customer will still receive unpaid invoice reminders, usage notification alerts and all other notifications that come from the Emersion system provided they are enabled by the service provider. This flag is used in reporting only. |
| Account Password | This is a clear text password that was designed to help your phone support staff validate the identity of a caller requesting support or sensitive information pertaining to the account. Service providers without a policy similar to this can enter '123456' or any 6 characters. The minimum number of characters for this field is 6. |
| Secret Questions and Answers | Up to 2 secret questions and answers can be nominated to help your phone support staff validate the identity of a caller requesting support or sensitive information pertaining to the account. |
| Gender | Select the contact's gender. |
| Marital Status | Select the contact's marital status. |
| Residential Status | Select the contact's residential status. |
| Date of Birth | Enter the contact's date of birth. |
| Birth Country | Enter the contact's country of birth. |
| Drivers Licence | Enter the number of the contact's drivers licence. |
| State licence | Select the state from which the contact's drivers licence was issued. |
| Licence Expiry Date | Use the date picker to select the expiry date of the contact's drivers licence. |
| Residency Status | Select the contact's residency status. |
| Enter the contact's passport number. | |
| Passport Expiry Date | Use the date picker to select the passport expiry date. |
| Passport Country of Issue | Select the country from which the contact's passport was issued. |
| Medicare Number | Enter the contact's medicare number. |
| No of Dependants | Enter the number of dependants the contact is responsible for. |
| Pension Card Type | Enter the contact's pension type. |
| End User portal Information - This is to give the account holder access to the End User Portal. | |
| User portal login | Uncheck this box if you do not want to set up End user portal access for this account or you want to set it up later. This can be done at any time under the Customer > Userportal tab. If you select this option, you will not be required to complete the mandatory fields for this section. |
| Username | Enter a username for the account. The full username when the customer logs into the End User Portal is as follows:
username + cumulus user suffix . E.g. emesupport@emersiontest.com.au or user@yourdomain.com.au. The cumulus user suffix is displayed to the right of the username field and always begins with an '@' symbol. Usernames can use A-Za-z0-9_.@ and must be a minimum of 2 characters. Usernames are not case sensitive. |
| Password | Enter a password for the end user portal. Minimum number of characters is 6 and the password is case sensitive. |
| Retype password | Confirm the password for the end user portal. |
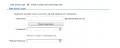
Wizard Screen 3: Billing Contact
When the user arrives at step 3 of the wizard, they are prompted to enter a billing contact. Primary and billing contacts are mandatory for all accounts.
If the primary and billing contact are the same people as often happens in an individual accounts, leave the checkbox 'Same as primary contact? checked, and proceed to the next step in the wizard. The system will flag the primary contact as the billing contact.
If the primary and billing contact are different people, uncheck the 'Same as primary contact? checkbox and complete the contact form for the billing contact. This form is the same as the previous form for the primary contact.
Wizard Screen 4: Secondary Contact
Emersion supports any number of additional contacts for an account, however this was not always the case. Prior to that enhancement, users could provide one additional contact, known as the Secondary Contact. This screen is a legacy option left over from that time.
Users can optionally enter a single additional contact here if they choose. If the user has several additional contacts to enter, we suggest doing this after the account is created and active. Additional contacts are entered and maintained under the Customer > Contacts tab.
If the user wants to enter a single additional contact as part of account creation, select New from the list of options, complete the contact form and proceed.
To skip entering another contact now, select Skip Secondary Contact from the list of options and proceed.
Finishing the Create Customer Wizard
Once users save and complete step 4, the account will be changed from a Preactive to an Active status, indicating it is ready to use. The user will be shown the main customer screen where they can inspect the sub tabs and enter additional information if needed.
