Difference between revisions of "Main Page/Provisioning/GNAF Address Infrastructure"
(→Fundamental Concepts) |
|||
| Line 266: | Line 266: | ||
[[File:Delete_port_two.png]] | [[File:Delete_port_two.png]] | ||
| + | |||
| + | == Stand Alone SQs == | ||
| + | |||
| + | * It is possible via cumulus, or an external API call to conduct a standalone SQ. | ||
| + | |||
| + | == Stand Alone SQs in Cumulus == | ||
| + | |||
| + | * In cumulus, navigate to Services -> SQ. | ||
| + | |||
| + | [[File:2015-02-27 11 06 24-Cumulus - Services - SQ.png]] | ||
| + | |||
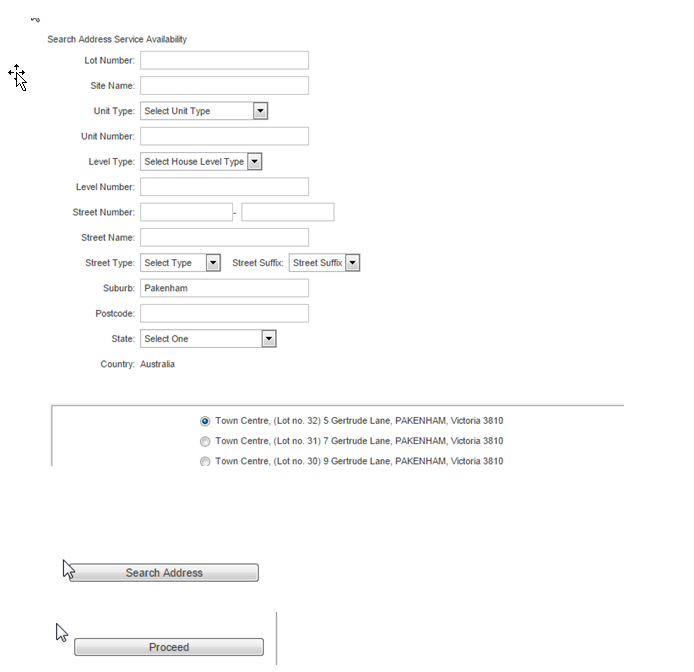
| + | * Enter your desired address details for searching then click Proceed | ||
| + | |||
| + | [[File:2015-02-27 11 09 38-Cumulus - Services - SQ address list.png]] | ||
| + | |||
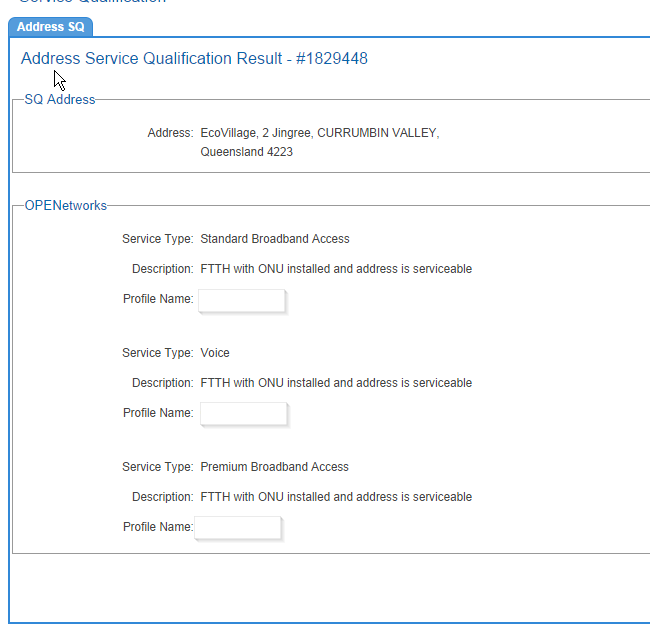
| + | * The SQ Result will show the service types available at the site and the nature of availability. If no port has been assigned to the address yet, you will see no reference to a port. | ||
| + | |||
| + | [[File:2015-02-27 11 12 39-Cumulus - Services - SQ Result.png]] | ||
| + | |||
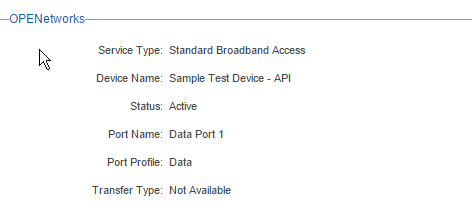
| + | * On the other hand, if there is a port assigned to the address, this will be displayed as well. It may be that the port is already used by another service, in which case it will state "Not Available as pictured below. | ||
| + | |||
| + | [[File:Port Available.png]] | ||
| + | |||
Revision as of 11:17, 27 February 2015
Contents
- 1 GNAF Instructure Overview
- 2 Fundamental Concepts
- 3 How Carrier Locations, Devices and Ports work together
- 4 The Building Blocks and how they fit together
- 5 Creating basic data about existing infrastructure/availability
- 5.1 Creating a new Carrier Location Profile
- 5.2 How to add a new GNAF address
- 5.3 How to assign a Location Profile ID to an existing address.
- 5.4 How to modify availability for a given service address
- 5.5 How to create a new device
- 5.6 How to create a Port Profile
- 5.7 How to add a port to a device.
- 5.8 Deleting a Port on a Device
- 6 Stand Alone SQs
- 7 Stand Alone SQs in Cumulus
- 8 The Ordering Process
GNAF Instructure Overview
- With the introduction of the NBN, Wholesalers are increasingly rolling out their own network infrastructure as opposed to relying on an upstream party.
The Emersion system has now been enhanced to permit the storage of network infrastructure details for a given carrier within an Emersion.
- This permits a given Wholesaler/Carrier to roll out their infrastructure to given addresses and store that information with Emersion. They can also use this same information to place an order and perform a service qualification.
- Cumulus will also assist with the management of network infrastructure. For instance, you can assign a port on a network device to a given address, and keep track of what ports have been assigned to which addresses.
Fundamental Concepts
- With the introduction of the NBN, Wholesalers are increasingly rolling out their own network infrastructure as opposed to relying on an upstream party.
- The Emersion system has now been enhanced to permit the storage of network infrastructure details for a given carrier within an Emersion.
- This permits a given Wholesaler/Carrier to roll out their infrastructure to given addresses and store that information with Emersion. They can also use this same information to place an order and perform a service qualification.
- Cumulus will also assist with the management of network infrastructure. For instance, you can assign a port on a network device to a given address, and keep track of what ports have been assigned to which addresses.
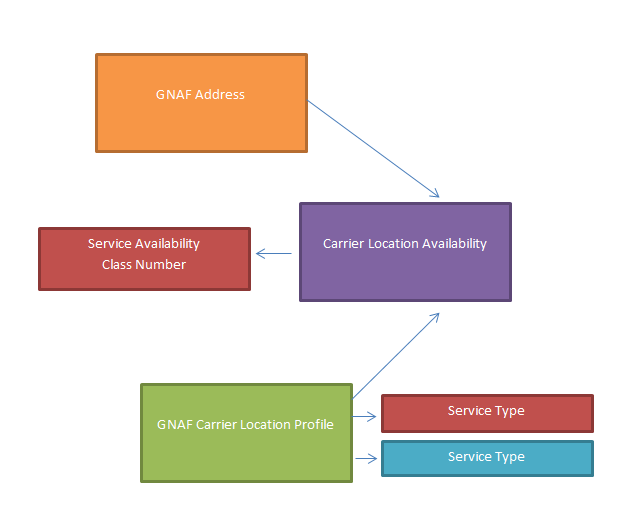
The picture below discusses the initial building blocks to ensure an initial SQ will pass.
- A GNAF address is as the name would suggest, an Australian residential ,business, or government address.
- The carrier location availability indicates whether the carrier is going to service a given address.
- The GNAF Carrier Location Profile tells the system what service types are available for the given address and the given carrier. This is important as when you perform a Service Qualification for a given address, this layer is needed to tell the system what service types are available for the address.
- The service availability indicates how much infrastructure is already in place via the Class Number. Even though all the infrastructure is not in place at a given address, A carrier may elect to allow a Service Qualification to pass. The class number is an indicator as to how "ready" the site is to accomodate a service.
- If a provider has stricter thresholds and requires a mandatory level of service availability to pass SQ, a default level can be set for the account.
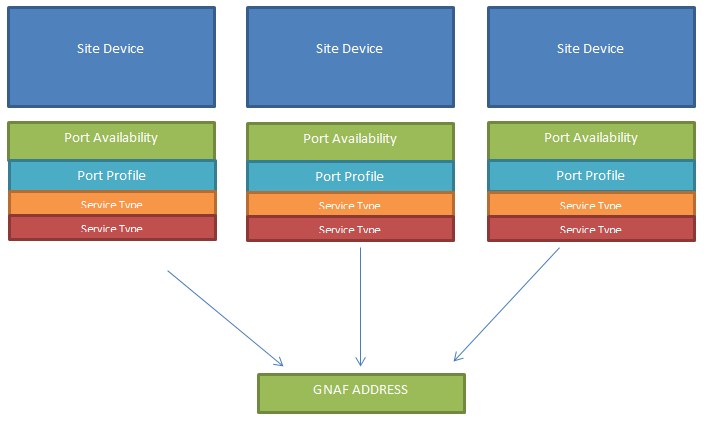
- A Site Device is a given piece of network infrastructure that has been installed by the carrier. A site device can have more than one port. A port availability record can be assigned to a GNAF Address. The structure below highlights that more than site device, could service a given GNAF Address.
- Each Port will also have a Port Profile. A Port Profile indicates what service types are associated with a Port. The reason for this is that a port could in principle support many different service types. Instead of making one port per service type, there is a profile which maps multiple service types to a given port. It helps by reducing the number of ports you need to create.
How Carrier Locations, Devices and Ports work together
- If the address has a Location Availability record and;
- The service type of the service plan has a matching service type to that of the GNAF Location profile and;
- The service availability threshold of the address matches the minimum required for the account then;
- The initial SQ will pass for the given address.
- During the activation stage of manual provisioning, you will be permitted to choose a Device and Port for the given address. If the service type of the plan matches the service type of the port, you can assign the port.
- If there is no port available, you may need to choose another device, port, or alternatively, you may need to reconfigure the port availability profile to indicate the desired service type is available for the desired device/port.
The Building Blocks and how they fit together
- To get to the end point of assigning a device/port to GNAF address and service, and an active package subscription for billing you will need in general terms as pictured.
Creating basic data about existing infrastructure/availability
Creating a new Carrier Location Profile
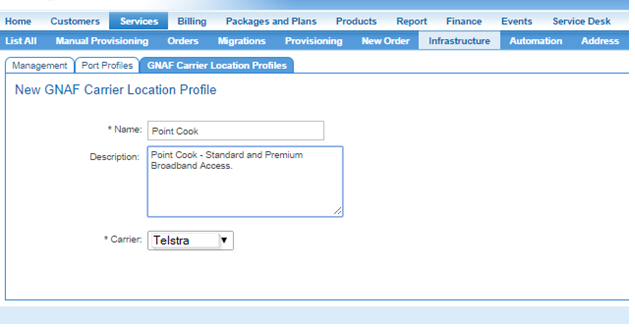
- First navigate to Services -> Infrastructure -> GNAF Location Profiles
- Click Create New
- Give your Location Profile a name and a description.
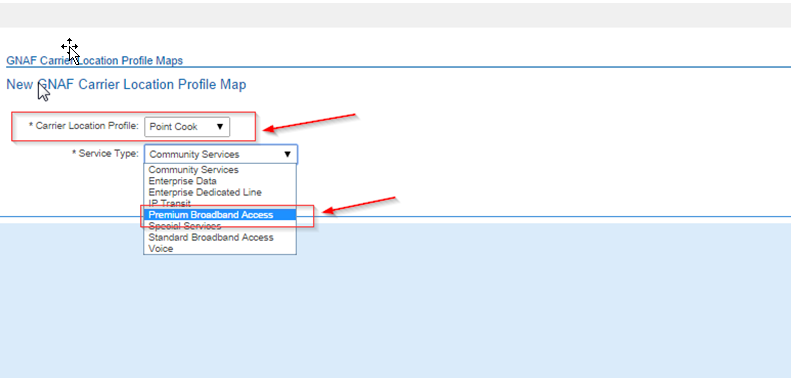
- After this you will need to indicate what service types are available for this location profile, via the Carrier Location Profile Maps.
- Go to the GNAF Carrier Location Profile Edit Page. Once you create a new profile you will automatically be redirected to this page. Click Create New to begin assigning a service type.
- Choose your carrier location profile and service type, click save.
How to add a new GNAF address
- If you need to add a brand new address that was previously not in the database, you can either add the address through the UI or if you wish, via the import tool.
Adding an address via the UI
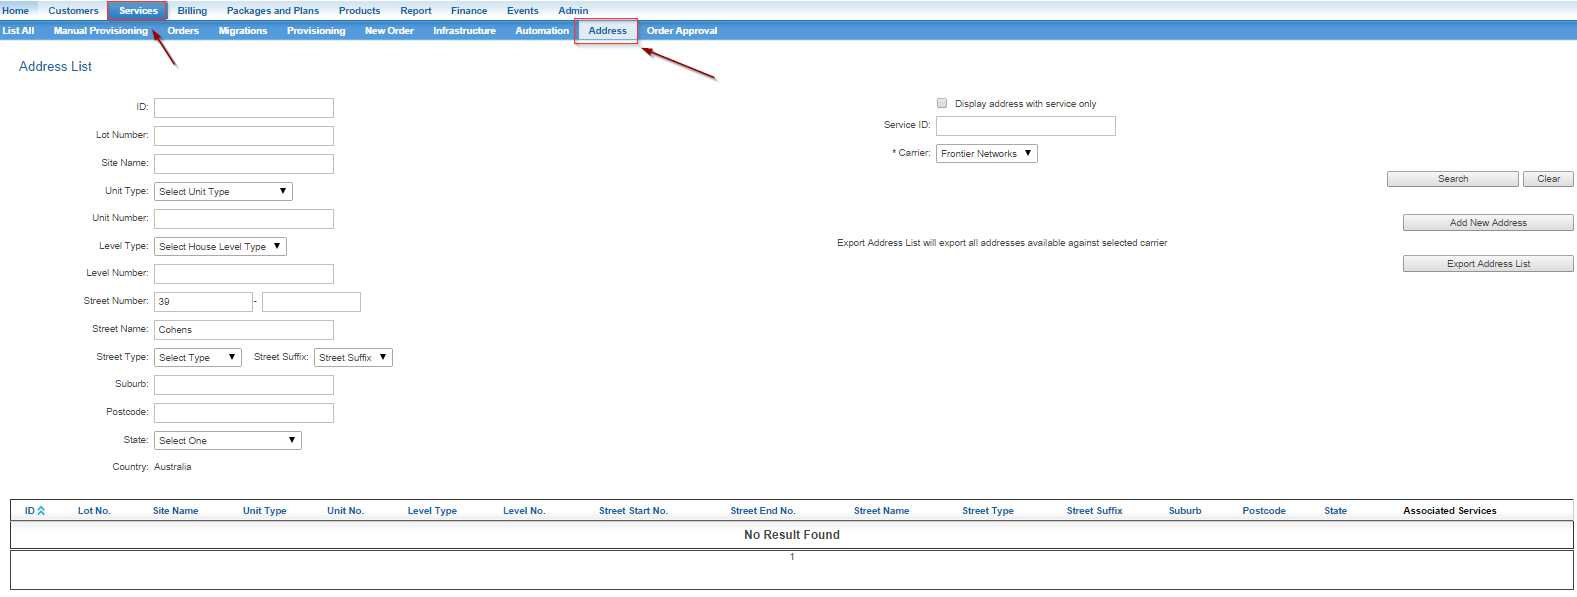
- Go to the Services Menu -> then the Address Sub Menu.
- From here, it would be advisable to do a search to see if it already exists before attempting to add it as pictured.
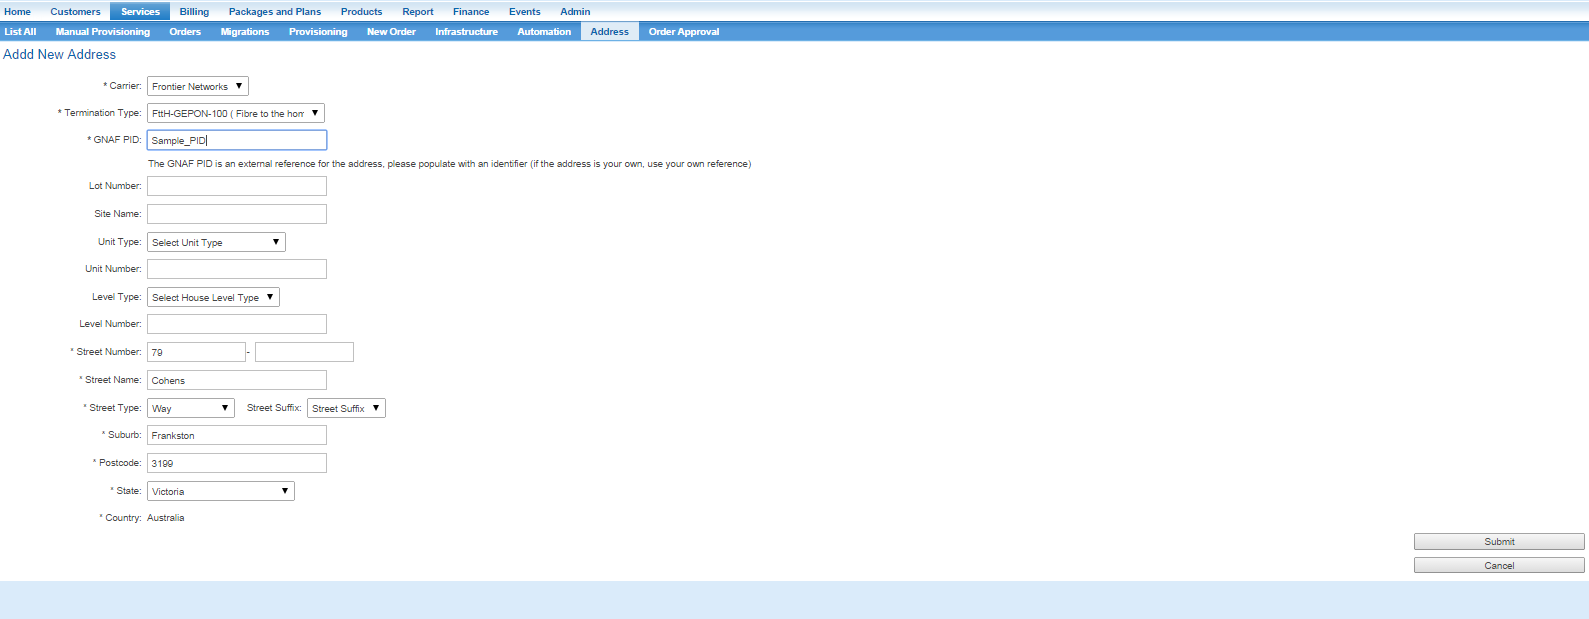
- If you are confident the address doesn't exist, then click Add New Address button on the far right of this screen as pictured above. Please note that this in of itself will not mean the address will pass SQ. You will need to add a carrier location availability record. See the section on "How to assign a Location Profile ID to an existing address". Alternatively you can use the import address functionality which will permit you to import the address and assign a location availability record at once.
Configuring the Email Template for your Import Results
- Before you run the import tool it would be wise to configure the email template which is used when the results are emailed to notify how successful the import was. Some imports are quite large so the system is designed to do the work in the background and email you when it has completed the work.
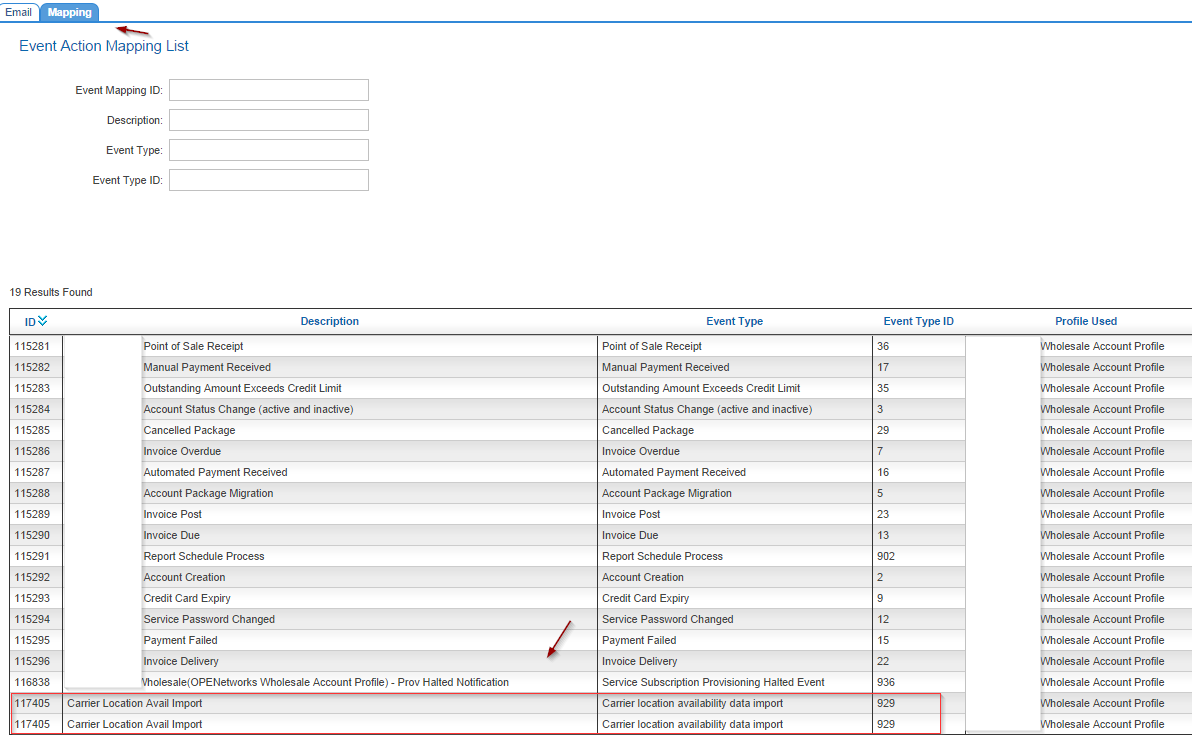
- Before you begin, you will need the relevant event mapping present (leave disabled until your event is ready). The event type is: Carrier location availability data import. If this is not visible via Events -> Mapping - Templates list, contact Emersion.
- Create a new Template via Events Menu -> Email Tab -> Create New Template
- Like any event, it will have standard fields that you will need to fill out (for setting up events you should refer to the events user guide see Events Home Page
- %%name%% This variable refers to the carrier name.
- %%processingSummary%% This variable gives an overall summary of how successful the import was. For example:
Address update file data import processing result details against carrier: Sample Carrier.
Total Records received to import: 4
Total Errors found during import: 2
Total New records created during import: 0
Total Existing records updated during import: 4
Total Unchanged records due to matching records found during import: 0
- %%processingDetail%% This variable lists all of the records were the system encountered an error and the nature of the problem. For all line items it could either create a new record for, or do a "partial" update, it will also list the GNAF Address ID where it was able to do this.
Import Processing Details as follows:
Errors Detail
0 Specified GNAF Carrier Location Profile [11111111] is not valid, cannot update carrier location availability ID [] - skipping update - line number - 2
1 Specified service availability desc [10000000] is not valid, cannot update carrier location availability ID [] - skipping update - line number - 5
Existing Records Updated Detail
CSV FILE LINE NO RECORD ID
2 513508
3 513368
4 513369
5 513370
- Once you are done with your template, hit save and enable the event mapping.
Adding an address via the Import Tool
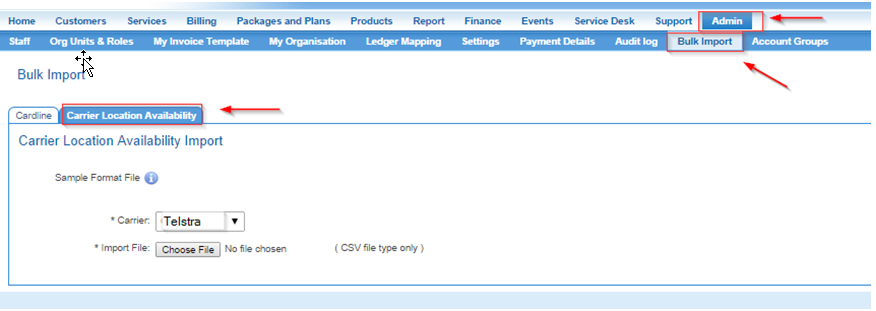
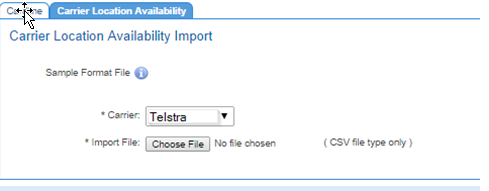
- Navigate to Admin -> Bulk Import - > Carrier Location Availability
- From here You can click "Import File" and choose a file to import.
- For a sample of the format file/reference, you can go to the Address section and click Export Address List button which will export all of your addresses. You can clear these if you are importing records and leave only the header row.
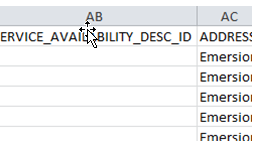
- In the import sheet, if the address is going to be a new address, it is critical that you leave the Emersion ID column on the far left blank. Is is how it knows the address will be blank.
- If you wish to import a new address with no carrier location availability record, you can do so. Simply leave Gnaf Carrier Locn Profile Id and the Service Availability Desc Id record fields empty. Note that when you get emailed the results of your import, it will flag an error saying these fields are empty, however you will note it will insert the GNAF Address anyway.
- If you wish to assign a carrier location availability record at the time of import, you can also do this by populating the Gnaf Carrier Locn Profile Id and the Service Availability Desc Id record fields.
- Once you are done with your file and you have uploaded and click Import, you will note that a workflow has been created to handle the import. Some imports are quite large so the system is designed to do the work in the background and email you when you are done. As a part of the setup there is also an email template that you can customize to your liking.
How to assign a Location Profile ID to an existing address.
- This section is for existing addresses only, if you need to add a new address, this is addressed separately. See how to add a new GNAF Address.
- Navigate to Admin -> Bulk Import -> Carrier Location Availability.
- Download a copy of your address data. You can do this by going to Services -> Address - > click on Address Export List button.
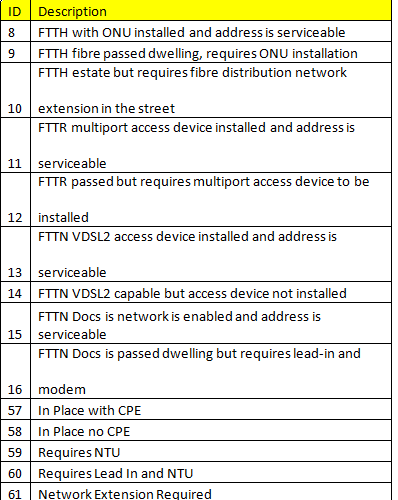
- In the spreadsheet, fill out the Carrier Location Profile ID, and the service availability Description ID. These values MUST be correct or else your import will fail. The Emersion ID to the far left must be populated and correct. If you have exported from your existing address database then you shouldn't have a problem in this respect.
- The Carrier Location Profile ID can be found in the UI as previously described. The current availability descriptions, and their ID’s are listed here:
- Once you have completed the spreadsheet, save it locally to your Pc or network drive. Select “Choose File”
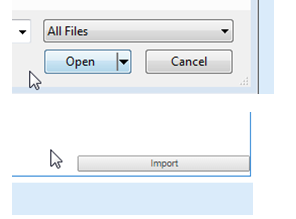
- Find your file, click open and choose Import. Assuming your event is enabled and a template created, you will be notified via email.
How to modify availability for a given service address
- The import tool will permit you to modify the carrier location profile ID and service availability description ID, however at this time it will not permit a removal of a carrier location availability record.
How to create a new device
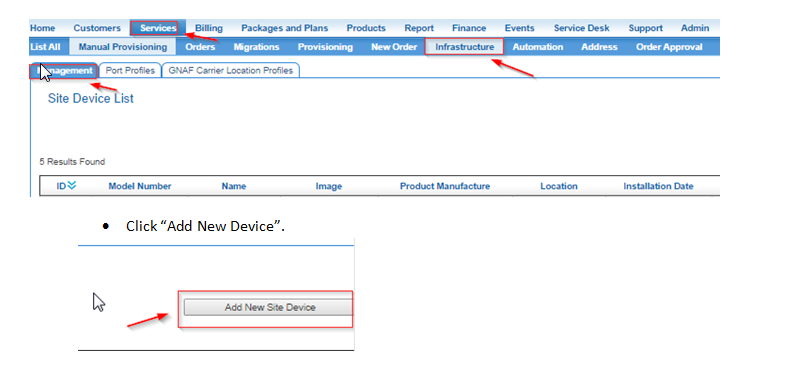
- Go to Services - > Infrastructure -> and click Add new Site Device
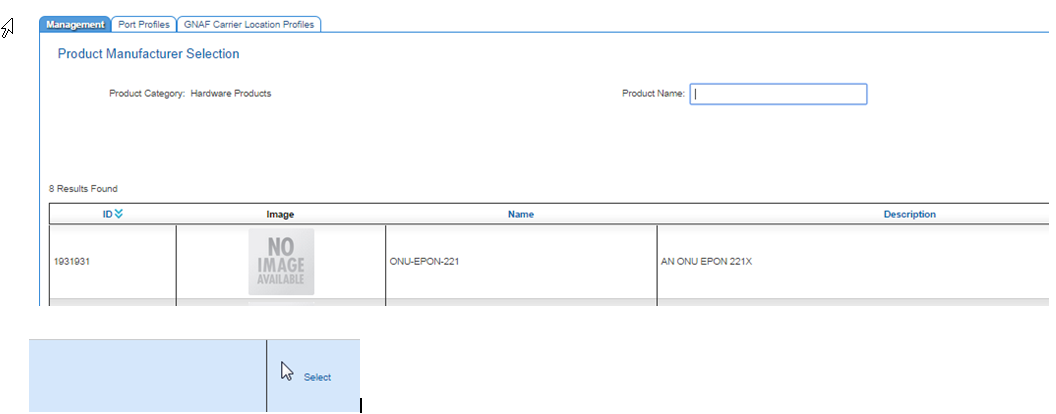
- Find your Product in your product list and click select. If it’s not here, then you will need to create it first. Refer to the Emersion user manuals for advice on this.
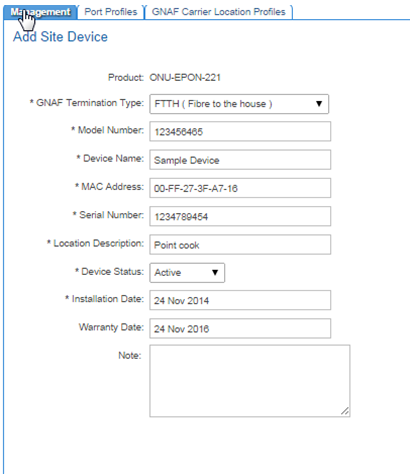
- Fill out the various attributes of the Device. Note that if the device is not active you will be restricted from assigning ports and devices to the address.
- Once you are done click submit.
How to create a Port Profile
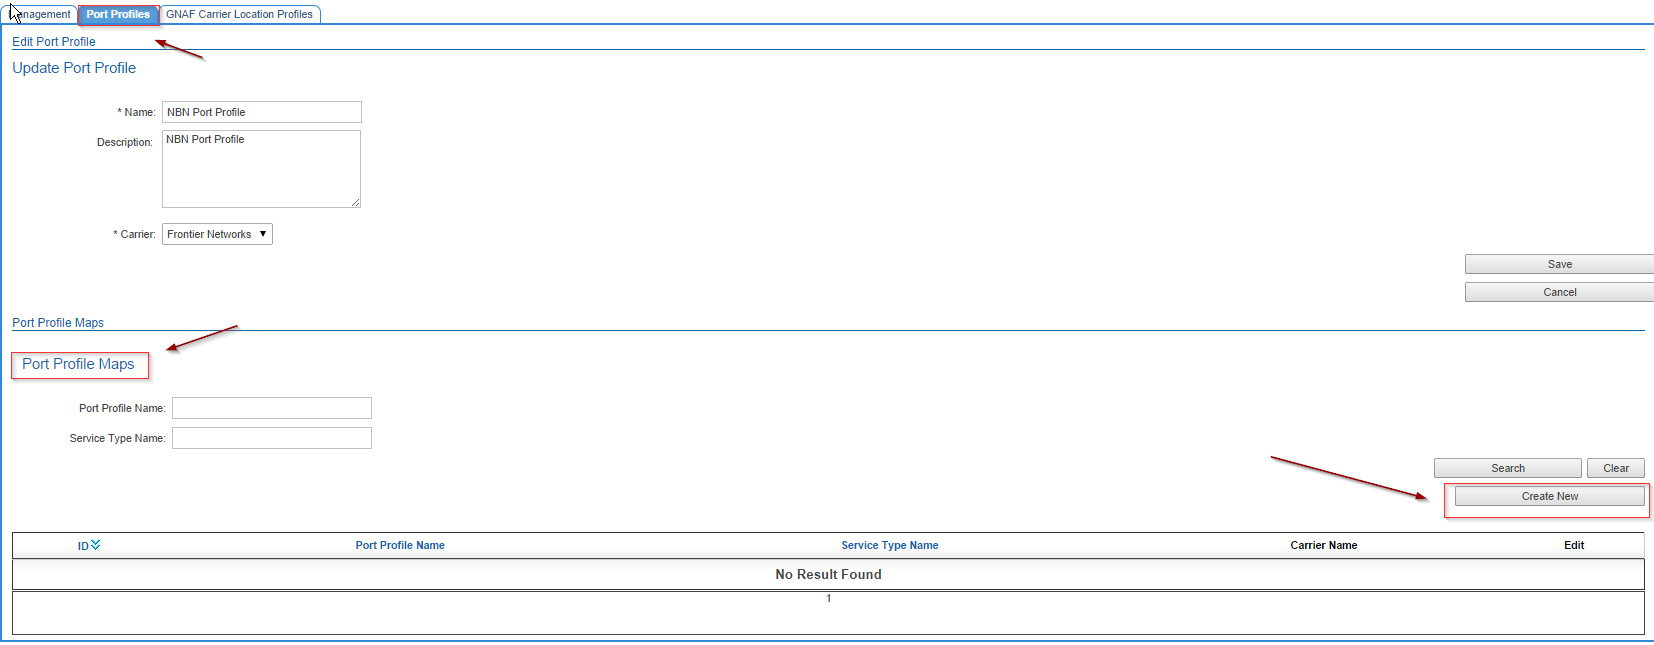
- Go to Services > Infrastructure > Port Profiles tab.
- Give your Profile a nam, choose your carrier, and click save to the far right.
- Now you are ready to edit the port profile you have created, we do this to assign the relevant service types that will be available against this port.
- From the window below you will see a section below that lists the port profile map. This describes what ports have been mapped to this profile. The idea behind this is that a given port in theory could support multiple service types. Rather than create multiple ports for each service type, this mapping process let's you create one port that supports multiple service types. Go ahead and "Create New".
- In the next window, in the drop down choose the port profile, and the relevant service type and click save. Go ahead and repeat the process for any other service types the port will support.
How to add a port to a device.
- Please note, at this time you cannot set a hard limit on the number of ports on a device. You also cannot create a port unallocated to an address.
- You can add a port to a device through the semi manual provisioning page (more on this later), or device management.
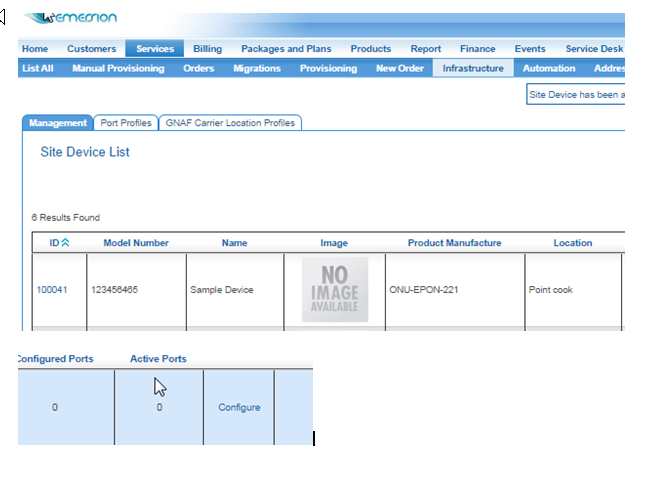
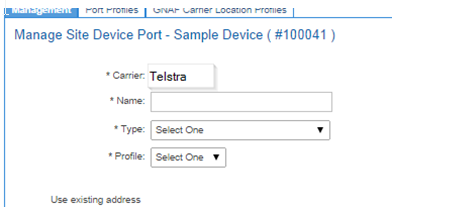
- To add through device management, go to Services > Infrastructure > Management > Configure Link.
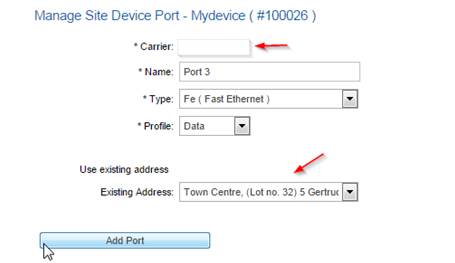
- Describe the port, assign a type and a port profile.
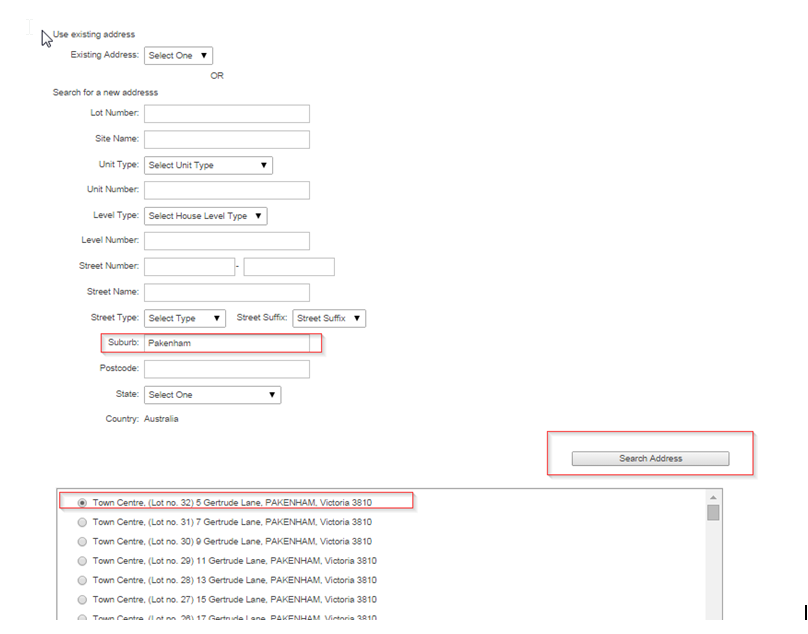
- Use the existing address against the port if already assigned, or search for a new address.
- Once you have found a desired address, click add port.
- Note that this in of itself will not start billing and it will not assign the port to an actual service associated and begin billing. It simply assigns the port to an address. Later on when you place orders you can assign a the port to the actual service.
Deleting a Port on a Device
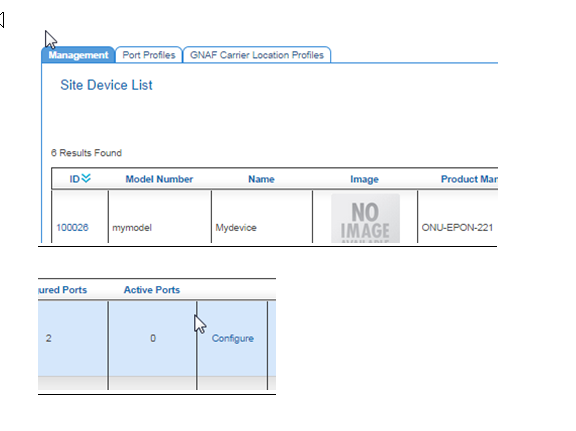
- Go to Services -> Infrastructure -> Management -> Then Click Configure next your site device.
- to the right you will have a list of ports.
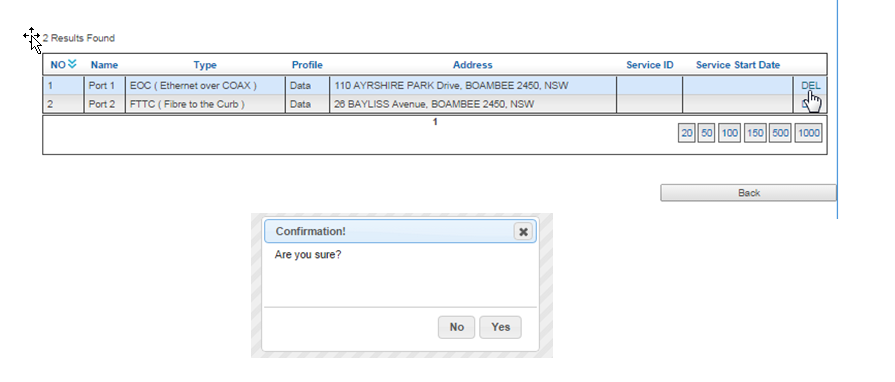
- Click DEL on the desired port. You will additionally see a confirmation dialogue.
- The port will be deleted and deallocated from the GNAF address.
Stand Alone SQs
- It is possible via cumulus, or an external API call to conduct a standalone SQ.
Stand Alone SQs in Cumulus
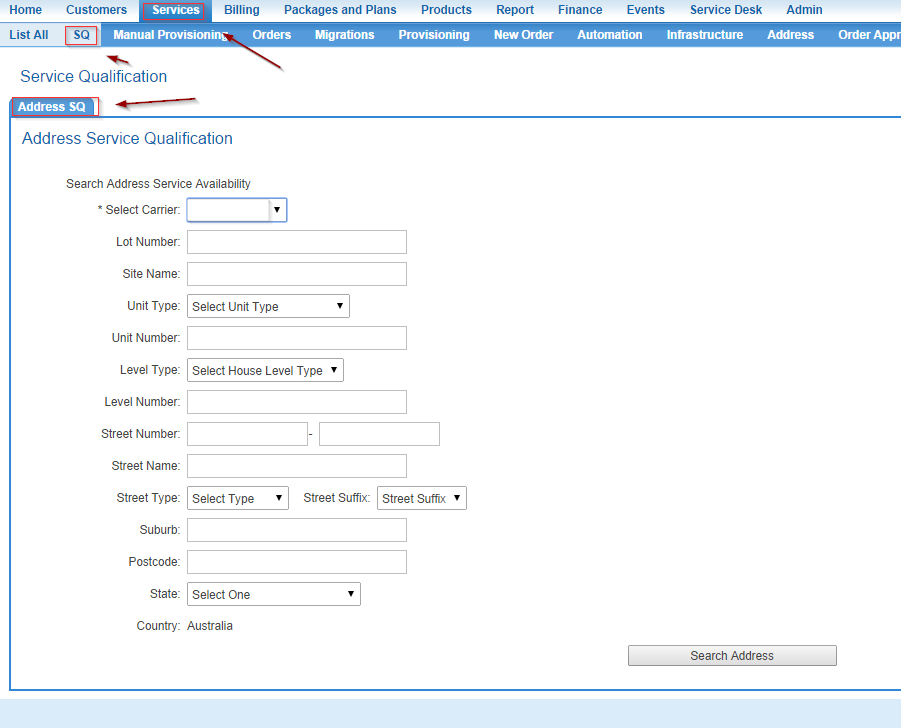
- In cumulus, navigate to Services -> SQ.
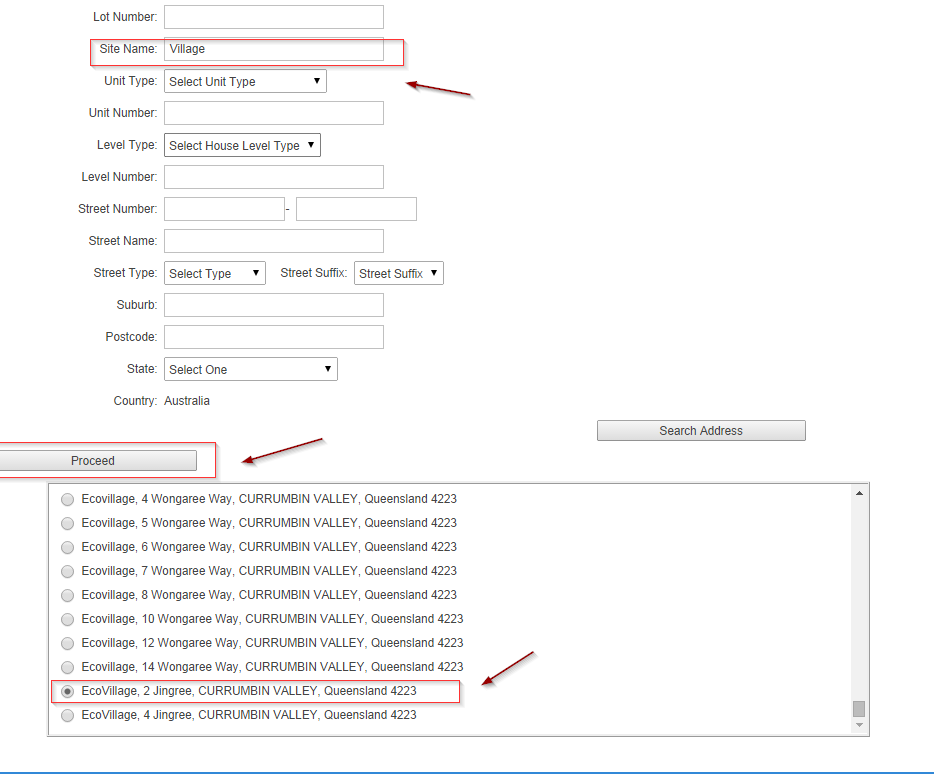
- Enter your desired address details for searching then click Proceed
- The SQ Result will show the service types available at the site and the nature of availability. If no port has been assigned to the address yet, you will see no reference to a port.
- On the other hand, if there is a port assigned to the address, this will be displayed as well. It may be that the port is already used by another service, in which case it will state "Not Available as pictured below.
The Ordering Process
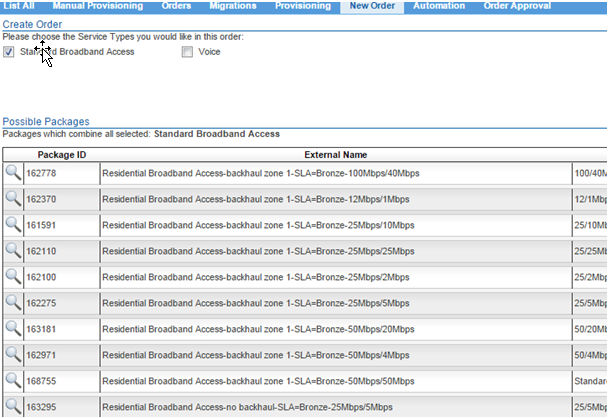
- Go to Services - > New Order.
- As with any with any order, you will see a preview package of orders.
- The next stage is the SQ. If your GNAF address has been been associated with Carrier Location Profile, it should pass this stage.
- Click enter SQ details, Enter various search criteria for the address and click search address, choose an address from the radio button and hit proceed.
- A list of packages will be listed. What is listed here will depend on the service types mapped to the relevant carrier location profile, and the matching service type on the service plan. Select the desired package.
- Choose the desired account in the next step of the wizard.
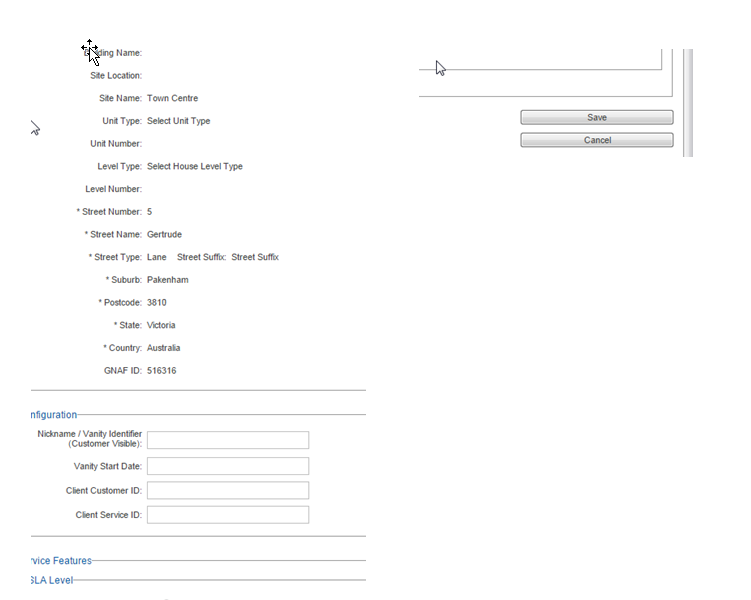
- At the next stage of the order you will be required to configure details against the broadband access service type. You may also be required to configure a service contact depending on the service type.
- Configure details for the service and any features and click save.
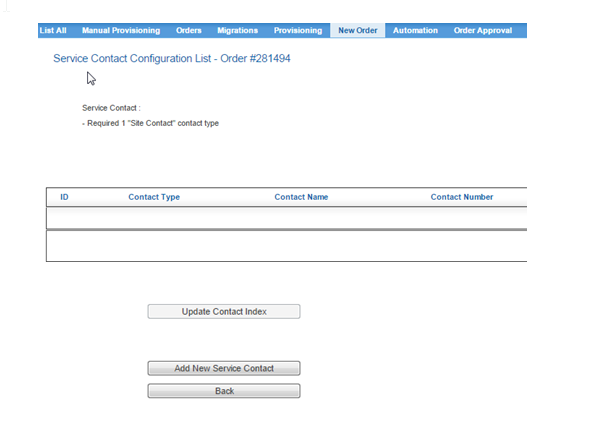
- Depending on the service type you may be required to add a new site contact.
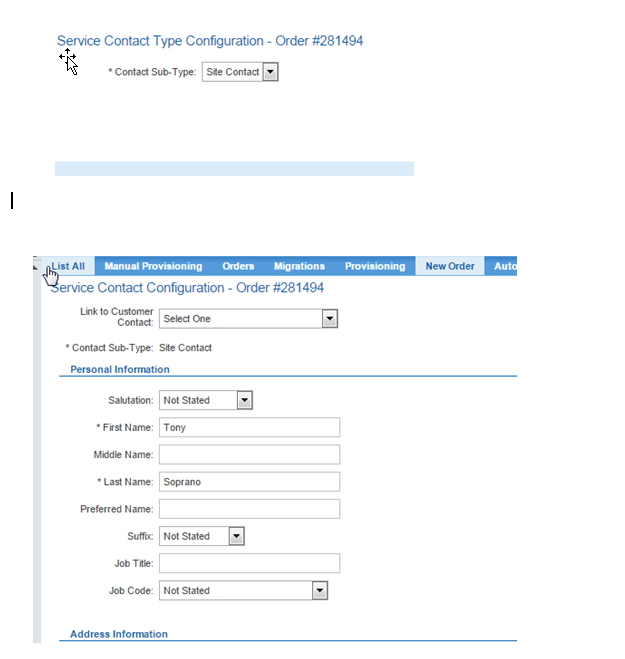
- Add Contact Sub Type and contact details and save.
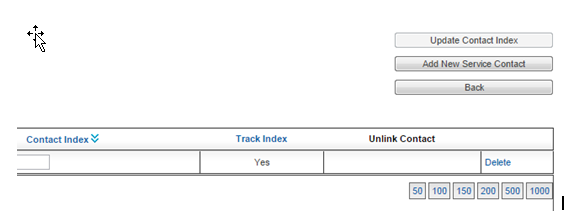
- You will see a confirmation screen, if you are happy click “back” to go back to configuration screen and also retain the newly saved/created contact.
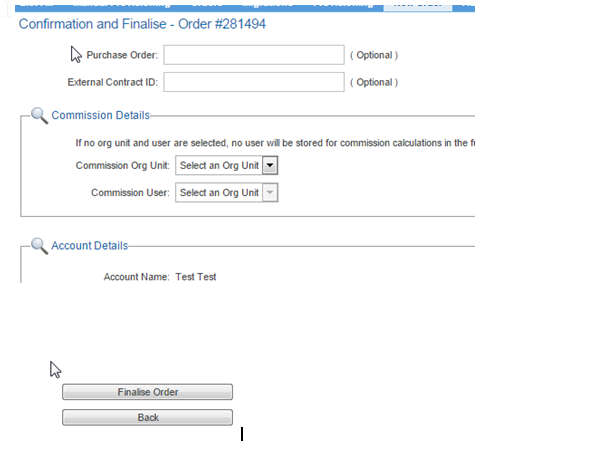
- On the confirmation and finalise page click “Finalise Order” when you are ready.
- From here you will need to go to manual provisioning to activate this service. This is normally done at wholesale account level.
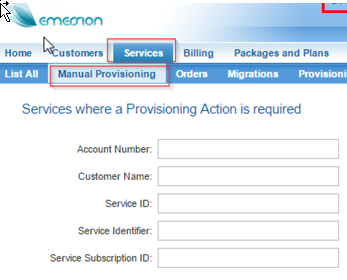
- Go to Services -> Manual Provisioning to find a list of services awaiting activation.
- Click the Activate Button against the desired service:
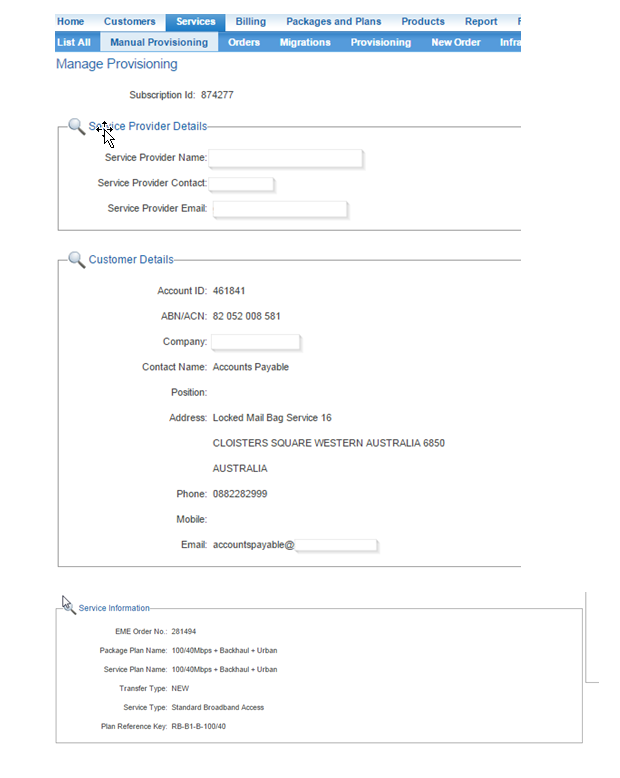
- The confirmation page lists extensive details about the service.
- If a Port is not already assigned to the address, you will likely see an "Add Site Device" button this screen. Click Add Site Device.
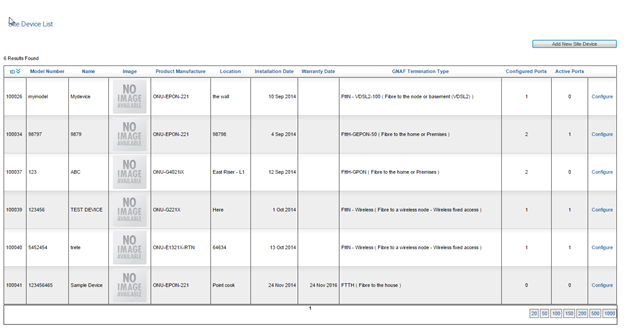
- The first section of this screen will give you a list of available devices. Please note it will show all devices, regardless of their actual proximity to the site address in question.
- At this point you have two options. You can “Configure” an existing device, to create a port against an existing device and assign it to the address.
- Alternatively you may add a new device.
- To add a new device click add new site device.
- Refer to the “add new device” section on adding devices as the UI is identical in this instance.
- To configure an existing device click configure in the Available Device List.
- Create a new port and assign it to the existing address you have provisioned the service against, then click Add Port.
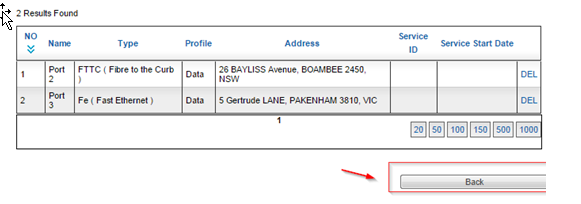
- Once you have added your port, click “Back”. Your changes will be retained, so these will not be lost.
- You will go back to the device list page, click the big X at the top right hand corner, don’t’ worry, your changes will still be saved.
- In the order details page, instead of seeing a link that says "Add Device", you will see instead "Add Service Port". This is used to confirm the service address assigned to the port.
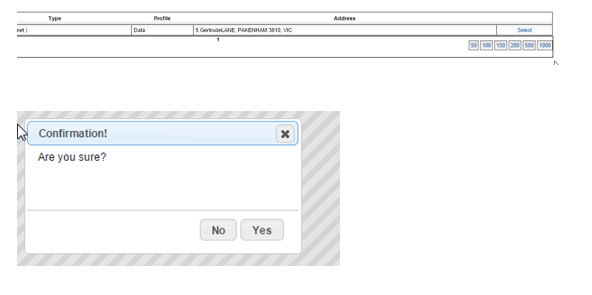
- Select desired address in this page and click select. Click Yes on the confirmation page when you are ready.
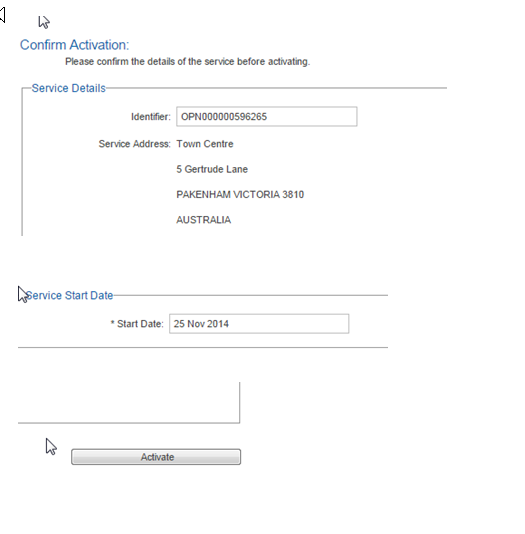
- After confirmation, the "Activate" button will become available at the bottom of the page. It will take you to one last confirmation page, where you should set an appropriate start date, then click Activate again.
